

Earlier this year, we went on a trip to Palawan for a shoot. Our intent was to shoot sunny, bright, vibrant, and happy images by beach, but we were faced with a few days of cloudy weather. Despite the circumstances, the shoot was a success and we were able to come home with some nice photos.
Here’s an example of an image shot under cloudy conditions:
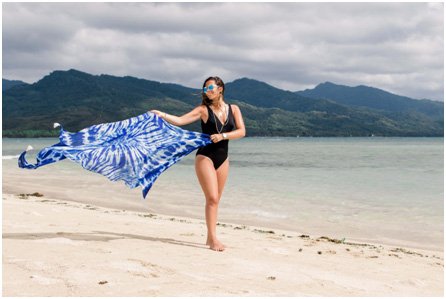
The sky is looking too dark or too gray for the photo to be an effective “bright, sunny day”

Here is another sample picture of how the sky looked that day
Now, in photo retouching, our job is to make the best out of what was given to us.We were able to create a more appropriate scene to the original idea of the shoot which is “sunny, bright, vibrant, and happy”.


Here are some of the techniques we used for each photo.
For this simple girl-on-a-beach photo, we used basic adjustments to give the sea a more vibrant look using a mix of tools such as
- Levels
- Curves
- Hue/Saturation
- Color Fill


Now, these techniques would not work the same for the sky since it is already filled with thick, grey could. So what I did for the sky was to completely replace it with another sky from our stock images.
First, we cut out the the sky to separate it from the rest of the photo.

Then, we placed the stock image onto the document. We made sure to layer the elements properly so they don’t overlap each other.
Here’s the before and after results of the edit.
Before and after
Here is another example of a photo take under cloudy conditions.

Before and after
By applying the same techniques from the previous photo, We were also able to transform this dull-looking photography to an insta-worthy snapshot of the model strolling around the sandy beaches of Palawan!
This photo is a bit more fun. Instead of just applying the usual Levels, Curves and Color Adjustments, we took retouching to another step. In this photo, we applied light flares.
As you can see, after applying Levels, Curves, and Color Adjustments, the photo still looks like it can still be improved. Good thing we have a library full of artificial flares we can apply on our images. These can make the photos look much dreamier than without it.
These are just some of the techniques we use to help improve the look of our shots in cloudy Palawan. View our gallery to see what other projects we’ve been busy with.
Thanks for taking the time to explain things in such great detail in a way that is easy to understand.
Hey Noah thanks! We’re glad to hear it, keep following for more useful tips 🙂